2. Logitech Unifying Software and Windows 11 Compatibility
The good news is that Logitech Unifying Software is generally compatible with Windows 11. Logitech has ensured that their core software solutions work with the latest versions of the Windows operating system. This means you should be able to download, install, and use the Unifying Software on your Windows 11 computer without major issues.
Potential Compatibility Issues and Solutions:
While generally compatible, occasional issues might arise due to specific system configurations or driver conflicts. Here are some potential problems and how to address them:
- Outdated Software Version: Ensure you are using the latest version of the Logitech Unifying Software. Check the official Logitech support website for updates.
- Driver Conflicts: In rare cases, conflicts with other drivers on your system might occur. Try updating or reinstalling your USB drivers or other Logitech drivers.
- Operating System Updates: While usually seamless, major Windows 11 updates could sometimes temporarily affect peripheral software. Keep your system updated and check Logitech support forums for any reported issues after significant Windows updates.
Suggestion: You could link to the official Logitech support page for Unifying Software and Windows 11 compatibility here.
3. Downloading and Installing Logitech Unifying Software on Windows 11
To use Logitech Unifying Technology, you’ll need to download and install the dedicated software on your Windows 11 computer.
Official Sources for Downloading the Software:
It is crucial to download the Logitech Unifying Software only from the official Logitech website. This ensures you are getting a safe and legitimate version of the software, free from malware or other security risks.
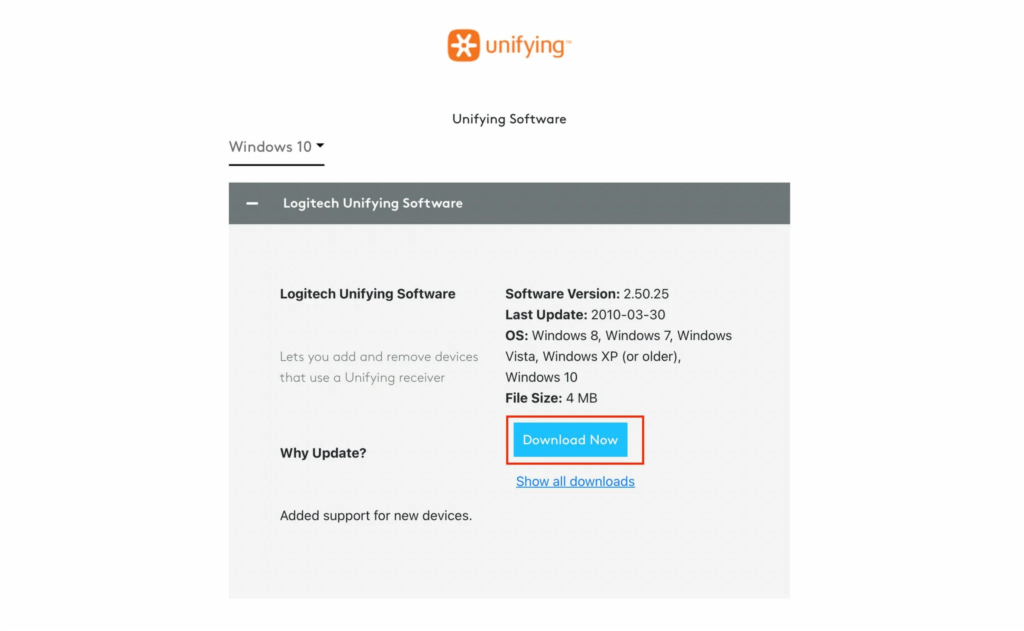
Link: [official Logitech support page for Unifying Software download]
Step-by-Step Installation Guide for Windows 11:
- Visit the Official Logitech Support Page: Open your web browser and navigate to the official Logitech support page for Unifying Software (link provided above).
- Locate the Download Link: Find the download link for the Windows version of the software. It should be clearly labeled.
- Download the Software: Click the download link and save the installer file to a location on your computer (e.g., your Downloads folder).
- Run the Installer: Once the download is complete, double-click the installer file (it will likely have a “.exe” extension) to begin the installation process.
- Follow the On-Screen Instructions: The installation wizard will guide you through the necessary steps. You will likely need to agree to the license terms and choose an installation location.
- Complete the Installation: Click “Install” or a similar button to start the installation. Wait for the process to finish.
- Restart Your Computer (Optional but Recommended): While not always required, restarting your computer after installing new software can help ensure everything is set up correctly.
Troubleshooting Installation Errors:
If you encounter any errors during the installation process:
- Ensure System Requirements are Met: Check if your Windows 11 system meets the minimum requirements for the software (though these are usually quite basic).
- Run as Administrator: Try right-clicking the installer file and selecting “Run as administrator.”
- Close Other Applications: Close any other applications that might be running in the background before starting the installation.
- Temporarily Disable Antivirus: In rare cases, your antivirus software might interfere with the installation. You can temporarily disable it, but remember to re-enable it after the installation is complete.
- Check Logitech Support Forums: If the issue persists, consult the Logitech support forums or knowledge base for solutions to specific error messages.
4. Connecting Logitech Devices Using Unifying Software on Windows 11
Once the Unifying Software is installed, you can start connecting your compatible Logitech devices.
Pairing a New Device with the Unifying Receiver:
- Launch the Logitech Unifying Software: Open the software from your Start Menu or desktop shortcut.
- Select “Advanced” (if available) or “Pair New Device”: The software interface might have a straightforward “Pair New Device” button or an “Advanced” option that leads to pairing.
- Follow the On-Screen Instructions: The software will guide you through the pairing process. This usually involves:
- Turning on your Logitech device.
- Ensuring the device is in pairing mode. This might involve pressing a specific button on the device (often a small, recessed button with a connect symbol) for a few seconds. Refer to your device’s manual for specific instructions.
- Waiting for the software to detect the device.
- Confirm the Connection: Once the device is detected, the software will usually prompt you to confirm the connection. Click “Yes” or “Pair.”
- Test Your Device: After successful pairing, test the functionality of your mouse, keyboard, or other connected device.
Managing Multiple Devices Connected to a Single Receiver:
The Unifying Software allows you to connect up to six compatible devices to a single receiver. Once paired, these devices will automatically connect to your computer when they are turned on and within range of the receiver. The software interface will typically show you a list of the devices currently connected.
Unpairing or Removing a Device:
If you need to remove a device from the Unifying receiver (for example, if you want to use it with a different computer or if it’s no longer in use):
- Launch the Logitech Unifying Software.
- Select the device you want to remove from the list.
- Click the “Unpair” or “Remove Device” button.
- Follow any on-screen prompts to confirm the removal.
5. Using the Logitech Unifying Software Interface on Windows 11
The Logitech Unifying Software interface is generally straightforward and user-friendly.
Navigating the Software Interface:
The main window typically displays a list of the Unifying receivers connected to your computer and the devices paired with each receiver. You might see options to:
- Add a new device: Initiates the pairing process.
- Remove a device: Unpairs a selected device.
- View device details: May show information like the device name and battery level.
- Access advanced settings (if available): Some versions might offer limited customization options.
Checking Device Status and Battery Levels:
The software often provides information about the connected devices, such as their status (connected or disconnected) and, for some devices, their battery levels. This allows you to easily monitor the power status of your wireless peripherals.
Customizing Device Settings (if applicable):
While the Unifying Software primarily focuses on managing connections, some versions or related Logitech software might offer options to customize device settings like mouse sensitivity, button assignments, or keyboard shortcuts. You might need to install additional Logitech software (like Logitech Options or Logitech G HUB, depending on your device) for more advanced customization.
6. Troubleshooting Common Issues with Logitech Unifying Software on Windows 11
Even with a smooth setup, you might occasionally encounter issues. Here are some common problems and potential solutions:
- Unifying Software Not Detecting Devices:
- Ensure the device is turned on and in pairing mode.
- Bring the device closer to the Unifying receiver.
- Try a different USB port for the receiver.
- Restart your computer.
- Reinstall the Logitech Unifying Software.
- Check if the device is actually compatible with Unifying Technology. Refer to the device’s documentation.
- Intermittent Connection Problems:
- Ensure the Unifying receiver is not obstructed by other objects.
- Keep the receiver away from other wireless devices that might cause interference (e.g., other Wi-Fi routers, Bluetooth devices).
- Try a different USB port.
- Check the battery level of your wireless device and replace it if necessary.
- Update the drivers for your USB ports and the Logitech Unifying Software.
- Software Not Launching or Responding:
- Restart your computer.
- Try running the software as an administrator (right-click the application and select “Run as administrator”).
- Reinstall the Logitech Unifying Software.
- Check for software updates on the official Logitech website.
- Conflicts with Other Software or Drivers:
- Try temporarily disabling other recently installed software or drivers to see if they are causing a conflict.
- Ensure your USB drivers are up to date. You can usually do this through the Device Manager in Windows 11.
- Receiver Not Being Recognized by Windows 11:
- Try a different USB port.
- Restart your computer.
- Check the Device Manager for any errors related to USB devices. You might need to update or reinstall the USB drivers.
- Ensure the Logitech Unifying Software is installed correctly.
7. Advanced Tips and Considerations for Logitech Unifying Software on Windows 11
To ensure a smooth and reliable experience with Logitech Unifying Software on Windows 11, consider these advanced tips:
- Keep Your Software Updated: Regularly check the official Logitech support website for updates to the Unifying Software. Updates often include bug fixes and performance improvements.
- Best Practices for Reliable Connections:
- Position the Unifying receiver in a clear line of sight to your devices whenever possible.
- Avoid placing the receiver near sources of electromagnetic interference, such as microwaves or power cables.
- Use a USB extension cable to position the receiver closer to your devices if needed.
- Securing Your Wireless Connection: While Unifying Technology uses a proprietary protocol, it’s generally considered secure for everyday use. However, keeping your software updated is always a good practice for security.
- Consider Logitech Options+: For newer Logitech devices, especially mice and keyboards with more advanced features, Logitech offers a newer software called “Logitech Options+” (or sometimes just “Logitech Options”). This software often includes the functionality of the Unifying Software and provides more extensive customization options. Check if your devices are compatible with Logitech Options+ as it might offer a better overall experience on Windows 11.
Suggestion: You could include a link to the Logitech Options+ download page here.
8. Alternatives to Logitech Unifying Software on Windows 11
While Logitech Unifying Technology is convenient, there are alternative ways to connect Logitech wireless devices to your Windows 11 computer:
- Using Bluetooth for Logitech Devices: Many newer Logitech wireless devices also support Bluetooth connectivity. You can pair these devices directly with your Windows 11 computer’s built-in Bluetooth adapter, eliminating the need for a USB receiver altogether.
- Direct USB Connections: Some Logitech peripherals, especially wired ones, connect directly via a USB cable.
- Logitech Options+ Software (if applicable to the device): As mentioned earlier, Logitech Options+ can manage connections for some devices and might use Bluetooth or a different type of receiver.
Suggestion: You could include a brief explanation of how to pair a Bluetooth device in Windows 11 here, perhaps with a link to a Microsoft support article.
9. Conclusion: Optimizing Your Logitech Wireless Experience on Windows 11 with Unifying Software
Logitech Unifying Software provides a convenient and efficient way to connect and manage multiple compatible Logitech wireless devices on your Windows 11 computer.
By understanding how to install, use, and troubleshoot the software, you can enjoy a clutter-free and productive computing experience.
Remember to keep your software updated and consider exploring alternative connection methods like Bluetooth or Logitech Options+ depending on your specific devices and needs.